We take a look at what’s inside the box & how to assemble the kettleCADDY pizza oven.
Here at kettleCADDY, we understand the value of an unboxing experience. Watch our unboxing to see what you can expect when purchasing the kettleCADDY Pizza Oven. Also, watch how to assemble the kettleCADDY.
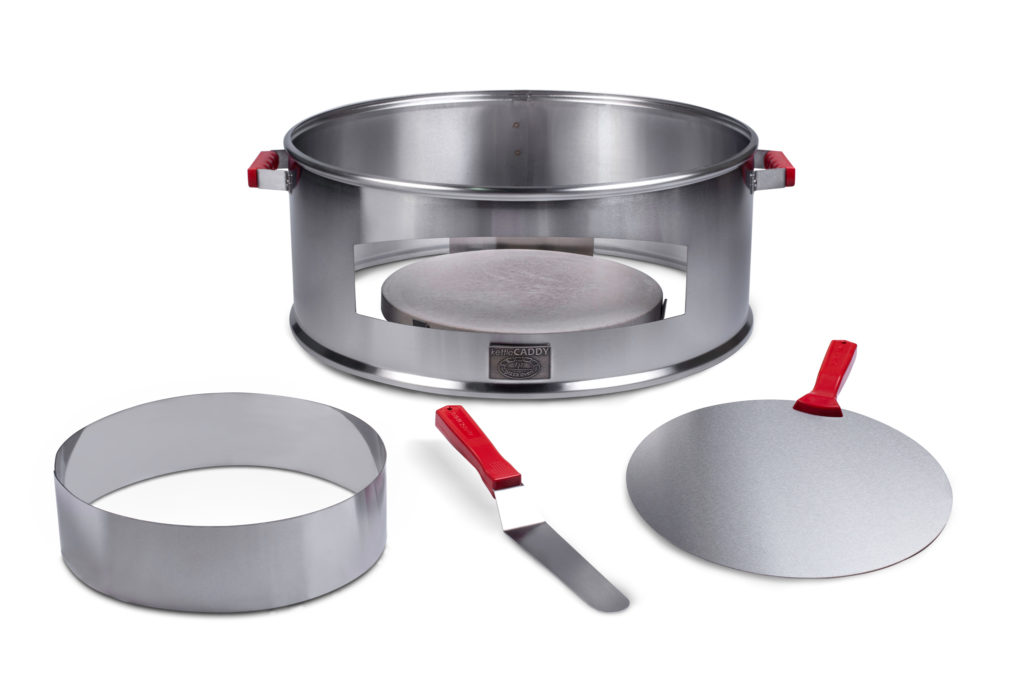
Your kettleCADDY comes with the following:
Pizza Oven Ring 57cm / 22.8in (Stainless Steel with profiles to fit the 57cm / 22.8in charcoal kettle grill drum & lid)
Pizza Oven Carry-handles (Stainless Steel with polyurethane handle grips)
Pizza Stone Support Bar (Stainless Steel)
Support Bar Bottom (Stainless Steel)
Pizza Stone Rotator Wheel (Stainless Steel)
Barrier Basket (Stainless Steel)
Pizza Stone (34cm x 25mm) / (13.6in x ¾in) (can be heated to 400°+ Celsius and bakes pizzas within 2-3 minutes)
Pizza Stone Stopper Plate (Stainless Steel)
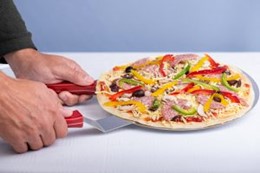
Pizza Paddle/Peel (Stainless Steel with polyurethane handle)
Pizza Lifter Spatula (Stainless Steel with polyurethane handle)
6 EASY STEPS TO PREPARE YOUR kettleCADDY BEFORE BAKING DELICIOUS PIZZAS
6 easy steps to prepare your kettleCADDY before baking delicious pizzas!
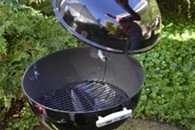
Step 1: Find a suitable safe & solid area for the Charcoal Kettle Grill unit. Remove the lid off the bottom drum and place it in a safe area close to the kettle.
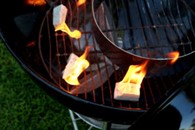
Step 2: Place the Barrier Basket on the bottom grill as shown in the (illustration below) and take the standard firelighter and place 4–5 small pieces on the outside parameter of the Barrier Basket and then light the firelighter.
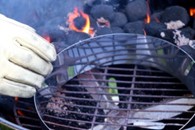
Step 3: As soon as the firelighter burns thoroughly, gently pour the charcoal (illustrated below) on top of the burning firelighter. Leave the charcoal until all the coals burn properly.
Step 4: Place a few (4-5) pieces of wood on top of the hot charcoal. Be sure to use wood that is dry and as thin as it needs to flame-up easily and burn constantly. We recommend black wattle, blue gum or even pine.
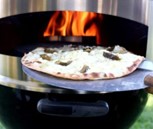
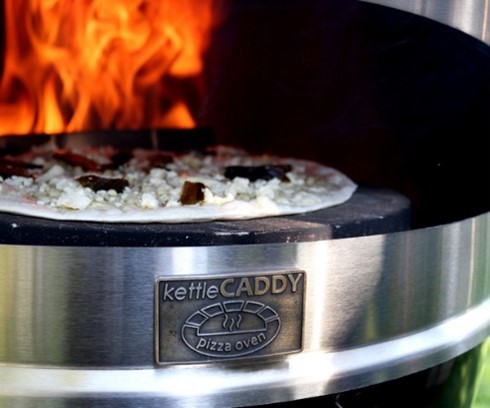
Step 5: First place the Pizza Stone on the Pizza Stone Rotator Wheel and then fit the Pizza Oven Ring onto the Kettle Drum and make sure that the Pizza Slot Opening is positioned away from the flames.
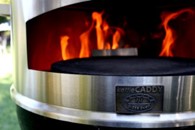
Step 6: Once the wood fires up and burns properly, place the Kettle braai lid on top of the pizza oven ring. This is to heat the Pizza Stone to the required temperature – pre-heat the Pizza Stone inside your CADDY for at least 20-30 minutes.
REMEMBER: The temperature of the Pizza Stone is key to the success of baking your pizzas and be sure not to use wood that is too thick! The quicker the wood can fire up, the better your baking process.
HOW TO BAKE A PIZZA IN YOUR kettleCADDY?
How to bake a pizza in you kettleCADDY?
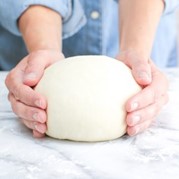
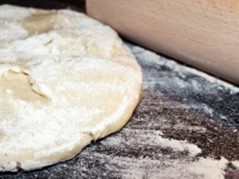
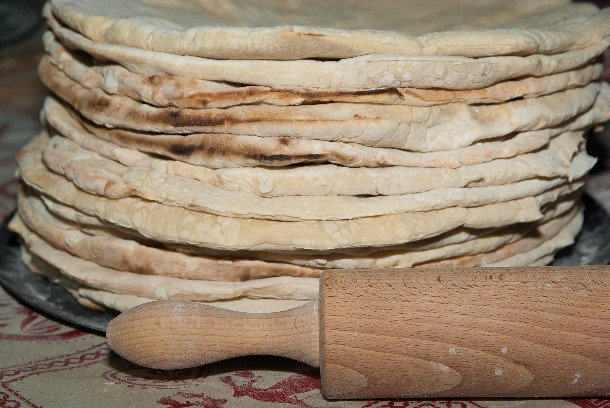
1. Get your pizza base ready! View our easy pizza base recipe or use pre-baked pizza bases for more convenience. For the best results, we recommend baking the raw pizza bases in your kitchen oven at 180◦C for 60 seconds max. Repeat the process until you have enough pizza bases for your baking.
2.Prepare your pizza toppings
3. Light the fire.
4. Prepare your first pizza with the tomato paste and toppings.
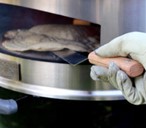
5. Slide pizza into the kettleCADDY oven opening and onto the kettleCADDY Pizza Stone using the kettleCADDY Pizza Paddle.
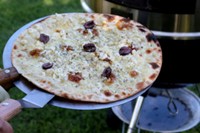
6. Bake the Pizza for 2 to 3 minutes – if it takes longer than 3 minutes, the Pizza Stone is not hot enough OR you do not have adequate heat (flames) in the chamber. Flames should be visible throughout the baking cycle. 7. Use your kettlecaddy Lifter Spatula to manually rotate the Pizza Stone to ensure an even baking of your pizza. 8. Remove the kettle braai lid as needed while baking when your chamber needs a bit of air to get the flames going again. Normally it will take a few seconds and as soon as the flames fire up properly, close the lid and continue with your baking cycle.
9. If you follow the instructions carefully, the result will amaze you – every time!
ENJOY!
HOW TO MAINTAIN YOUR kettleCADDY PIZZA OVEN?
HOW TO MAINTAIN YOUR kettleCADDY PIZZA OVEN
Maintaining the kettleCADDY pizza oven will give you better results every time.
It is relatively easy to maintain and doing so will maximise the performance and enhance longevity.
Clean just the outside of the unit with warm soapy water with a soft sponge.
DO NOT wash the Pizza Stone with water and soap – simply scrape the Pizza Stone whilst it is still hot by removing any dough and/or food from the surface of the Stone. This procedure will maximise the lifespan of your Pizza Stone.
You can leave your CADDY on top of your Charcoal Kettle Grill when not in use.
Here at kettleCADDY, we are continuously striving to upgrade and improve our product range to ensure that we stay relevant to our customer demands. Since 2011 we have gone through various progressive development phases of the kettleCADDY Pizza Oven and to effectively provide the sustainability and longevity of our products, we decided to change all the grip handles of our products from wood to ABS plastic. This was truly a step in the right direction and was well received by our customers.
Manage Cookie Consent
We use cookies to optimize our website and our service.
Functional
Always active
The technical storage or access is strictly necessary for the legitimate purpose of enabling the use of a specific service explicitly requested by the subscriber or user, or for the sole purpose of carrying out the transmission of a communication over an electronic communications network.
Preferences
The technical storage or access is necessary for the legitimate purpose of storing preferences that are not requested by the subscriber or user.
Statistics
The technical storage or access that is used exclusively for statistical purposes.The technical storage or access that is used exclusively for anonymous statistical purposes. Without a subpoena, voluntary compliance on the part of your Internet Service Provider, or additional records from a third party, information stored or retrieved for this purpose alone cannot usually be used to identify you.
Marketing
The technical storage or access is required to create user profiles to send advertising, or to track the user on a website or across several websites for similar marketing purposes.